Most “ergonomic desk setup” guides read like a shopping list - $1,400 chair, $600 monitor arm, $300 keyboard tray. And then you assemble it all and still end up slouched at the end of the day, because nobody told you the part that actually matters.
The best desk setup for good posture is a geometry problem. Eyes level with the top of the screen. Elbows at a relaxed 100-110 degrees. Feet flat. Monitor an arm’s length away. You can hit every one of those numbers with a $0 stack of books and an old kitchen chair, and your back will thank you more than a Herman Miller would.
This guide is the version I wish someone had given me three years ago, when I was trying to fix the “tech neck” I’d developed from a year of laptop-on-couch working. It covers the exact measurements, the cheap upgrades that punch above their weight, the mistakes that wreck even good setups, and the one thing no chair can fix.
The 60-Second Setup Check
Before we get into the detail, here’s the geometry your desk should hit. If everything below is true right now, you’re already 80% of the way there:
| Body part | Target position | Why it matters |
|---|---|---|
| Feet | Flat on floor (or footrest), ankles roughly under knees | Anchors the pelvis; prevents forward slide |
| Knees | Bent ~90°, slightly below hip height | Keeps pelvis tilted neutral, not tucked under |
| Lower back | Supported by lumbar curve of chair | Holds the spine’s natural inward curve |
| Torso to thighs | 100-110° (slight recline) | Reduces disc pressure vs. upright 90° |
| Shoulders | Relaxed, not shrugged or rolled forward | Prevents trapezius and neck strain |
| Elbows | Bent ~90-110°, close to ribs | Wrists stay neutral over keyboard |
| Wrists | Straight, not bent up/down/sideways | Reduces RSI and forearm fatigue |
| Eyes | Level with a point 2-3” below top of screen | Head stays balanced over spine |
| Monitor distance | 20-40 inches (arm’s length) | Reduces eye strain and forward lean |
Cornell University’s ergonomics group, which has been publishing computer workstation guidelines for 30+ years, summarizes it like this: when seated normally, your eyes should land 2-3 inches below the top of the monitor casing, and the center of the screen should sit about 17-18 degrees below horizontal. OSHA’s computer workstations etool puts the screen distance at 20-40 inches and the screen center at 15-20 degrees below eye level.
If any of those are off, the rest of the article tells you how to fix it - cheaply.
Why Your Desk Setup Matters More Than You Think
Desk workers report a 30-50% one-year prevalence of lower back pain, according to research published in PMC - several times the rate seen in the general population. That isn’t because desk work is inherently dangerous. It’s because most desks are set up to make poor posture the path of least resistance.
A monitor 4 inches too low pulls your head forward by an inch or two. A keyboard 3 inches too high lifts your shoulders into a permanent shrug. A chair that’s slightly too deep tips your pelvis back and rounds your lower spine. None of these feel wrong in the first 20 minutes. By hour 6 they’re a knot between your shoulder blades that follows you home.
Geometry is where to start. The steps below are ordered by impact.
Step 1: Get Your Chair Right (The Foundation)
Everything else stacks on top of your chair. Get this wrong and the rest doesn’t matter.
The three adjustments most people skip
Even on a basic office chair, three settings change everything:
-
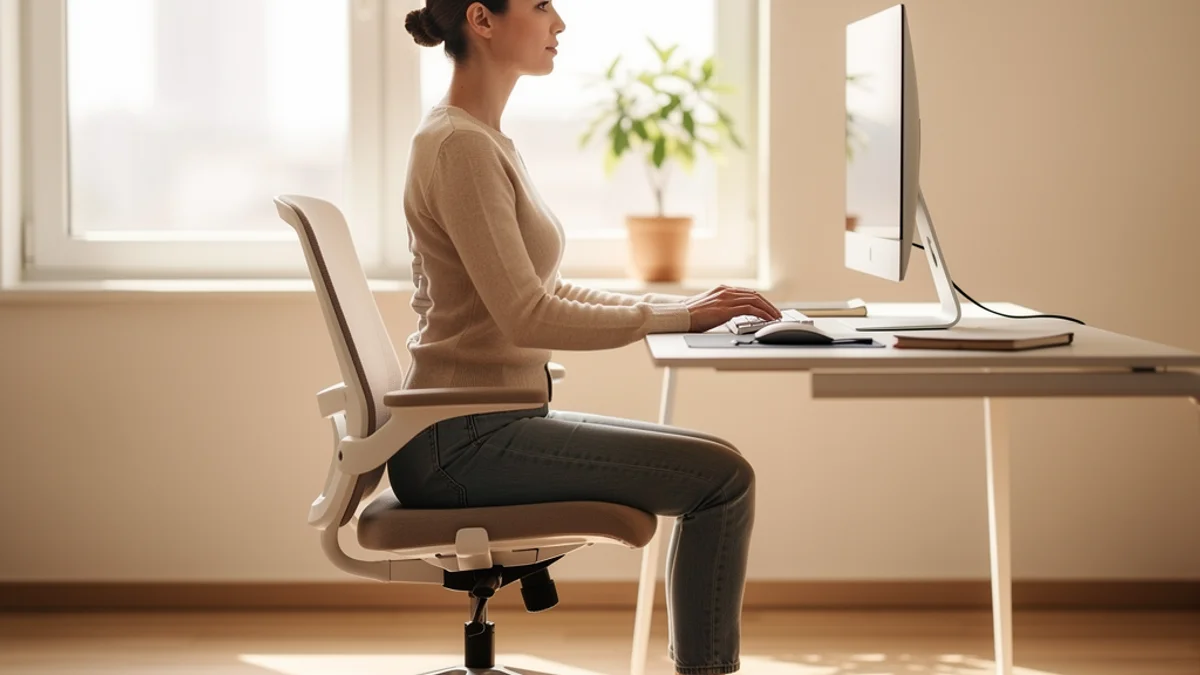
Seat height. Plant both feet flat on the floor. Your thighs should be roughly parallel to the ground, with your knees at or slightly below hip height. If your feet dangle, you don’t need a new chair - you need a footrest. A stack of two reams of printer paper works fine.
-
Seat depth. With your back fully against the backrest, you should have a 2-3 finger gap between the back of your knees and the front of the seat. Too deep and you’ll perch on the front edge with no lumbar support. Too shallow and your thighs aren’t supported.
-
Backrest recline. Set it between 100 and 110 degrees - a slight backward lean, not fully upright. Cornell’s research shows this position reduces spinal disc pressure compared to a rigid 90° posture. Sitting bolt upright looks disciplined but loads your lumbar spine harder than a relaxed lean.
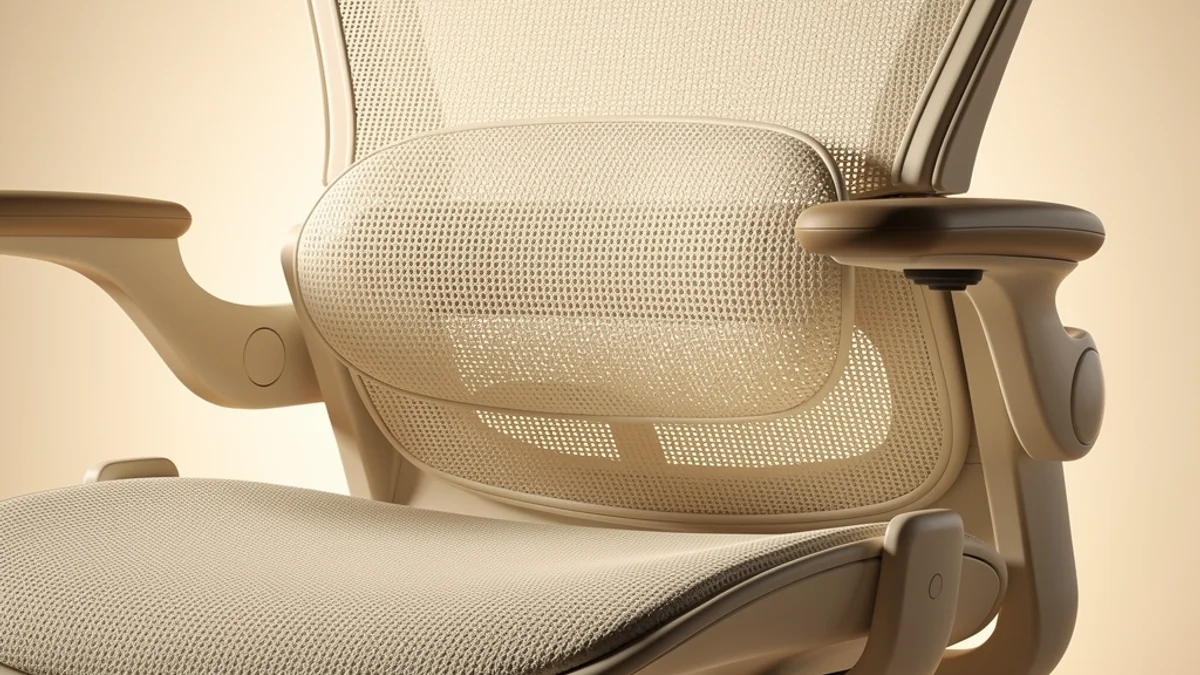
Lumbar support: the cheap fix that works
If your chair has built-in lumbar support, slide it up or down so it cradles the small of your back, not your mid-back. If it doesn’t, a rolled-up towel or a small cushion does the job for $0. Place it at the small of your back, where the spine curves inward - roughly level with your belt.
Do you need a $1,000 chair?
Honestly, no. A $200 chair adjusted correctly will outperform a $1,200 chair adjusted poorly. What you actually need:
- Adjustable seat height
- Adjustable seat depth (or a chair the right depth for your femurs)
- Lumbar support, even if you have to add it yourself
- Adjustable armrests, set so your shoulders relax and elbows rest at ~90-110°
If you’re shopping on a budget, the ergonomic home office on a budget guide breaks down what to spend on (and skip) under $100.
Step 2: Monitor Height and Distance
This is the single biggest fix most people make - and the one that gives the biggest immediate relief from neck pain.
The eye-level rule
The top of your screen should sit at or slightly below your seated eye level. More precisely: when you look straight ahead, your eyes should land on a point about 2-3 inches below the top of the monitor casing. That puts the center of the screen at roughly 15-20 degrees below horizontal, which is exactly where OSHA recommends the visual centerline should sit.
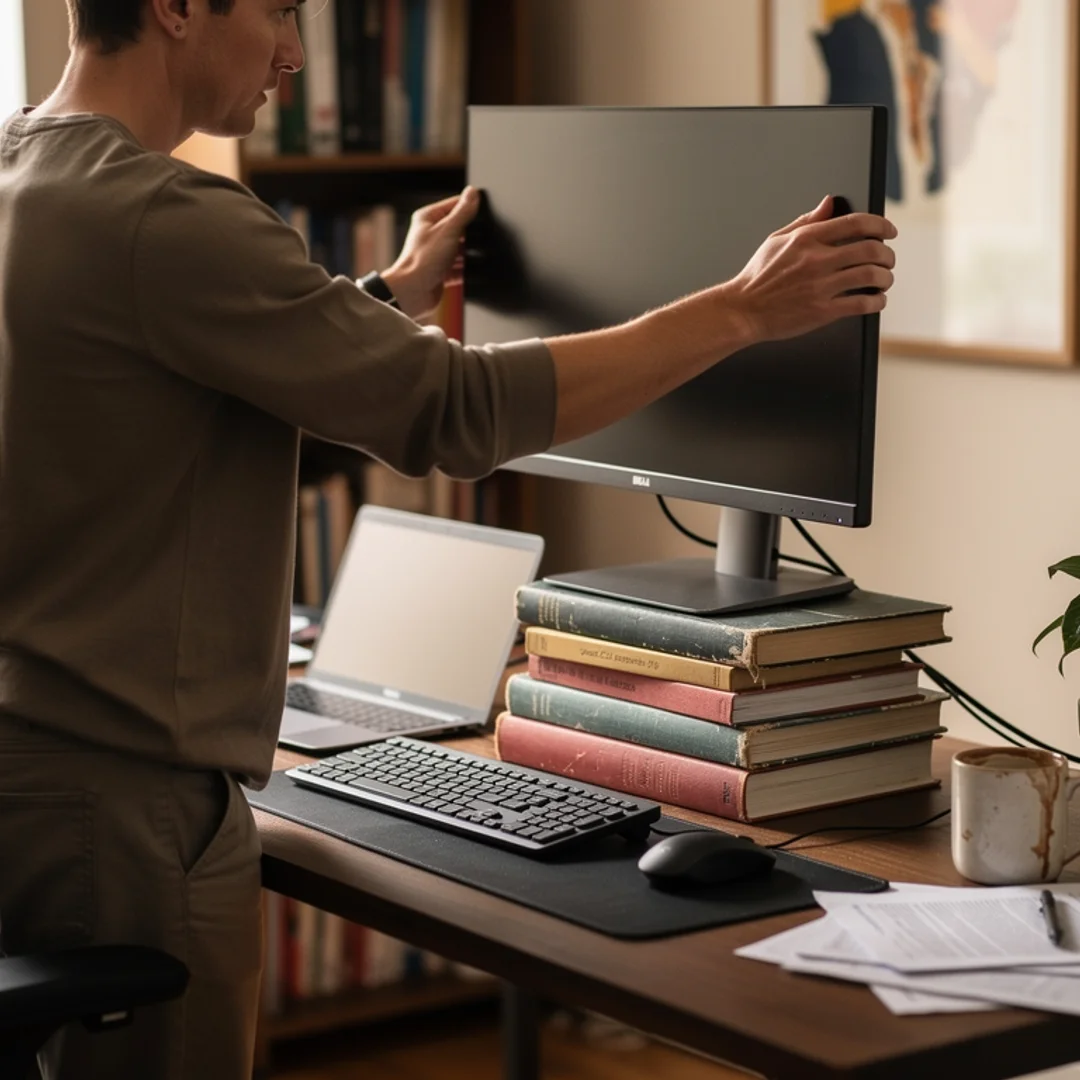
For most adults, this means raising the monitor. Stack books under it until the top edge is level with your eyes. A $20 monitor stand works. A $0 stack of hardcovers works equally well.
The arm’s-length rule
Sit in your normal working position. Reach forward with your arm extended. Your fingertips should just brush the screen. That’s roughly 20-28 inches for most setups, and OSHA’s range tops out at 40 inches for very large monitors.
If you sit closer than that, you’re either reading too small a font (bump it up) or your eyes are working too hard (move the monitor back). If you sit further, you’ll start leaning forward to read - and forward lean is where the trouble starts.
Laptops are the problem
Working off a laptop on a flat desk forces a brutal trade-off: either your screen is too low (and you crane your neck) or your hands are too high (and your shoulders shrug). You cannot win.
Two ways out:
- Plug in an external monitor at proper height. Use the laptop screen as a secondary or close it.
- Get a laptop stand plus an external keyboard and mouse. A $30 laptop stand and a $40 wireless keyboard solves more posture problems than any chair upgrade.
If you’ve spent the last year working laptop-on-couch, the work from home ergonomics guide has more on rebuilding a setup that doesn’t wreck your neck.
Two monitors
If you use two screens, position your primary monitor directly in front of you and the secondary one to the side. Don’t centre the gap between them - that forces constant head-turning to either screen and creates asymmetric neck strain. Cornell explicitly recommends no more than 35 degrees deviation to either side from straight ahead.
If you use both screens roughly equally, consider an ultrawide monitor instead. One curved screen with no bezel in the middle reduces head movement and gives you the same horizontal real estate.
Step 3: Keyboard, Mouse, and Wrist Position
Most “wrist pain” isn’t really about the wrist. It’s about how your shoulders and elbows are positioned, which dictates where your wrists land.
Elbow angle and keyboard height
With your shoulders relaxed and elbows hanging close to your sides, your forearms should be parallel to the floor or angling slightly downward - never angling up. If you’re reaching up to a keyboard that sits above elbow height, you’ll spend the day in a low-grade shoulder shrug.
Two fixes:
- Lower the keyboard. Most desks are 29-30 inches tall - too high for most adults to type at without shrugging. A keyboard tray under the desk drops the typing surface by 4-5 inches.
- Or raise the chair and add a footrest. If you can’t lower the keyboard, raise yourself instead. You’ll need a footrest to keep your feet supported.
Wrist position: the rule of straight
Your wrists should be straight in three directions:
- Not bent up (extension)
- Not bent down (flexion)
- Not bent sideways toward the pinky (ulnar deviation)
That last one is the silent killer. Most full-size keyboards force your wrists to splay outward to reach the home row, especially if you have a numeric keypad pulling the alphanumeric section to the left of your body’s centerline. If you don’t use the numpad daily, switch to a tenkeyless (TKL) keyboard. It centers the typing area on your body and sits the mouse closer to your shoulder. Both wins.
Mouse position
The mouse should sit at the same height as the keyboard, on the same plane, as close to your body’s centerline as possible. The biggest mouse mistake: parking it 6 inches to the right of the keyboard, then reaching out and forward to use it. Your right shoulder will be permanently pulled out of socket-alignment by 5pm.
Centering the keyboard helps. So does pulling the mouse closer in. If your mouse hand still feels strained, a vertical mouse (which keeps your forearm rotated like a handshake instead of palm-down) takes pressure off the wrist and forearm. They feel weird for the first week and then you’ll never go back.
Wrists shouldn’t rest while typing
Counterintuitive but important: wrist rests are for resting, not for typing on. When you type, your hands should hover slightly above the keyboard, with movement coming from the elbows and shoulders. Crushing your wrists into a wrist rest while typing presses on the median nerve and is one of the fastest paths to carpal tunnel symptoms.

Step 4: Desk Height (And What to Do When It’s Wrong)
Standard desks are 29-30 inches tall. This is the wrong height for most adults. The “right” desk height depends on your seated elbow position with shoulders relaxed - usually 25-27 inches for someone 5’4” to 5’9”, and 27-29 inches for someone 5’10” to 6’2”.
If you can’t replace your desk, you have two options:
- Raise yourself with a higher chair + footrest. Cheap and instant.
- Lower the keyboard with a tray or pull-out shelf. Better for long-term ergonomics because it keeps your monitor at the right height too.
A height-adjustable desk solves this and lets you alternate between sitting and standing - which is where the occupational health research keeps landing, not on “always stand.” A University of Waterloo study found that 40% of healthy adults developed lower back pain after just two hours of standing work. Lead author Daniel Viggiani’s takeaway: “The key take-away, regardless of whether you are sitting or standing at work, is to move around and shift your posture often.”
If you’re choosing between sitting and standing, the standing desk vs sitting posture guide has more on the 2024 research and the actual ratio that works.
Step 5: Lighting, Sound, and the Stuff Nobody Mentions
The geometry is most of the win. But three other factors quietly wreck good setups.
Glare on the screen
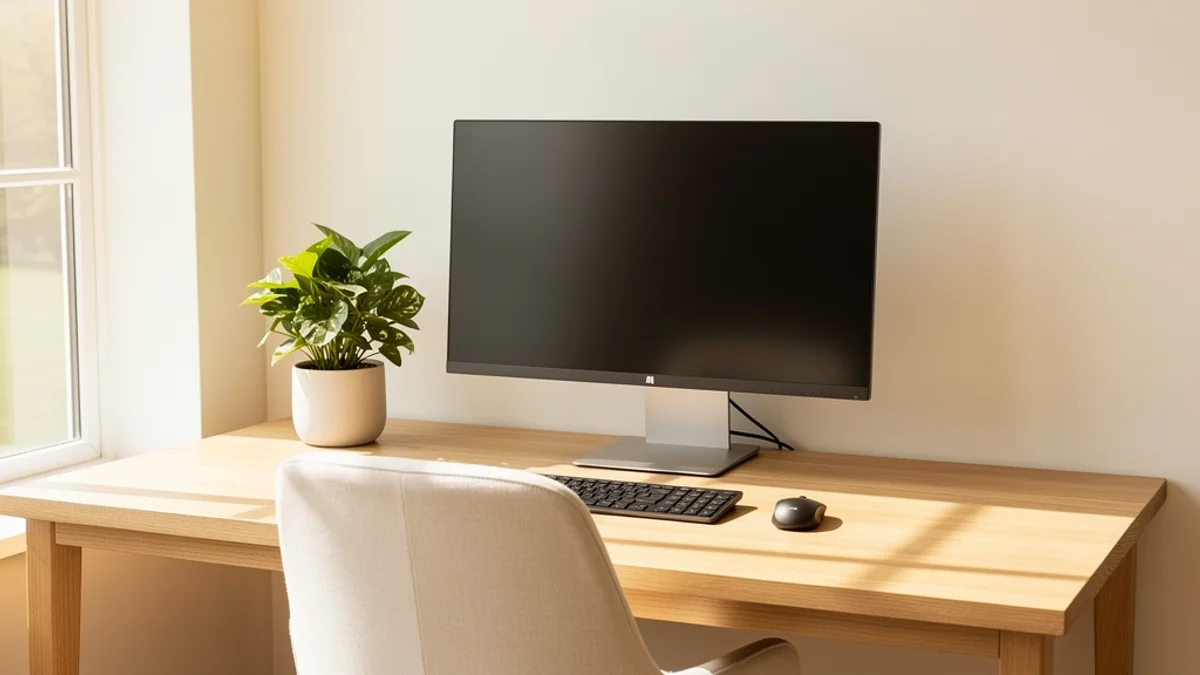
If there’s a window behind your monitor, you’re working against backlight - your eyes constantly adjust between bright window and dimmer screen, and you’ll lean forward to compensate. If a window is in front of you, glare on the screen does the same thing.
Position your monitor perpendicular to the window, with the window to the side. If that’s not possible, blackout curtains or a monitor hood (a $15 fix) eliminates glare without rearranging your room.
Reading from a flat document
If you reference a paper document while typing, get a document holder that sits at the same height as your screen, immediately to its side. Don’t lay it flat on the desk. Looking down repeatedly to a flat document is functionally the same as having a laptop screen too low - your neck flexes 30+ degrees on every glance.
Bad audio drives bad posture
This one surprises people. If your speakers are tinny or your microphone is bad, you’ll lean toward the screen on every call. Over a 60-minute meeting, that’s a slow forward creep that ends with your nose 12 inches from the monitor. A decent USB headset or a halfway-good external mic is technically a posture upgrade.
What No Desk Setup Can Fix
Here’s the part most ergonomic guides won’t tell you: even a perfect setup loses to time.
A 2025 systematic review and several earlier studies have all landed on the same conclusion - variability beats position. Sitting in a perfectly aligned chair for 8 hours straight still causes stiffness, disc dehydration, and reduced circulation. Your spine is built to move, and holding any position long enough is the problem.
That’s why the 20-8-2 rule - 20 minutes sitting, 8 minutes standing, 2 minutes moving - keeps showing up in occupational health recommendations. The numbers aren’t magic. What matters is switching positions before your body locks into one.
Two practical ways to actually move:
- Tie movement to existing triggers. Stand up every time a meeting ends. Do 10 shoulder rolls every time you push code. Walk to refill water every hour.
- Use software that nudges you. A posture reminder app catches the slow slouch creep before it becomes pain. The clever ones (full disclosure: SitApp is one of them) use your existing webcam to detect when you’ve been slouched for too long and nudge you before your neck starts complaining.
The posture exercises for desk workers post has a 5-minute routine that’s worth doing at lunch or end-of-day to reset whatever your morning beat up.
How SitApp Fits Into a Posture-Friendly Desk Setup
A perfect desk setup only works when you’re using it correctly - and after the first hour, most people drift. You can’t watch your own back, and willpower doesn’t scale to an 8-hour workday.
SitApp runs on your existing webcam, learns what your good posture looks like during a quick calibration, and gives you a gentle nudge when you start slouching or your head drifts forward. The image processing happens 100% on-device - no video frames, photos, or biometric data ever leave your computer. It’s free to try.
That awareness - catching the slouch before your neck starts aching - is the part no office furniture store sells.
FAQ
What’s the best desk setup for back pain?
Get the geometry right first: feet flat, lower back supported, screen at eye level, elbows at 90-110°. Then move regularly - alternate sitting and standing every 20-30 minutes if possible. Most desk-related back pain is caused by holding any one position too long, not by the position itself. Adding lumbar support to your existing chair and raising your monitor to eye level fixes more pain than any single equipment purchase.
How high should my desk be for good posture?
The “right” height depends on your seated elbow position, not your height alone. With your shoulders relaxed and elbows hanging close to your ribs, your keyboard should sit just below elbow height so your forearms are parallel to the floor or angling slightly downward. For most adults that’s 25-29 inches - not the standard 29-30 inches most desks come at.
Is a standing desk better for posture than sitting?
No, neither alone is better. Sitting all day causes back pain; standing all day causes back pain too. A University of Waterloo study found 40% of people developed lower back pain after just 2 hours of standing. The benefit of a standing desk is that it lets you alternate - and alternation is what helps. If you’re not actually going to switch positions, a regular desk is fine.
What’s the most important thing in a desk setup?
Monitor height. If your screen is too low, you’ll crane your neck forward all day, no matter how good your chair is. Get the top of the screen level with (or just below) your eyes - even if it means stacking books under your monitor. This single change relieves more neck and upper-back pain than any other adjustment.
Do I really need an ergonomic chair?
No. A correctly-adjusted $200 chair beats a poorly-adjusted $1,200 chair. What matters: adjustable height, adjustable depth, lumbar support (built-in or a rolled towel), and armrests that let your shoulders relax. If your current chair has those four things, you don’t need to upgrade - you need to dial in the settings.
Should my elbows be at 90 degrees when typing?
Close, but slightly more open is better. Cornell’s ergonomics research recommends 100-110° for most desk work - a slightly relaxed angle, not a sharp 90°. Your forearms should be parallel to the floor or angling very slightly downward, not upward. If your elbows are angled up to reach a high keyboard, your shoulders will be in a permanent shrug.
The Setup You’ll Actually Use
The best desk setup for good posture is one you’ll actually use - and that usually means starting with what you have. Raise your monitor on a stack of books, lower your keyboard with a tray, add lumbar support to your existing chair. That’s enough to get the geometry right without spending anything.
This week:
- Today: Raise your monitor until the top edge is at eye level. Cost: $0 if you have books.
- This week: Check your elbow angle while typing. If you’re shrugging, lower the keyboard or raise the chair.
- This month: Build a movement habit. Stand up between meetings, do shoulder rolls every hour, walk to refill water.
You don’t need to fix everything at once. Each adjustment compounds. A monitor at the right height plus a chair you can actually sit back in plus a keyboard at elbow height is already 90% of the way to a setup that won’t hurt you - and the last 10% is movement, which no piece of furniture can sell you.
Want help with the awareness part - the catching-yourself-slouching that no chair can do? Try SitApp free. Your existing webcam, a 30-second setup, and gentle nudges when your shoulders start creeping forward. Privacy-first, on-device processing, no video data leaves your machine.
Your spine doesn’t need a $1,400 chair. It needs the geometry to be right and the freedom to move - which, practically, means getting the monitor height sorted first and building from there.
